Rolled Roofing Nailing Pattern

The Standard Nailing For Asphalt Shingles Is A Four Nail Pattern With Nails Placed 1 Inch From Each End Of Each Shingle And Then Shingling Diy Roofing Roofing

Pin On Gutters And Downspouts

Pin On Deck

Metal Roofing Screw Placement Metal Roof Installation Roofing Diy Roof Installation

Typical Standing Seam Roof Detail From Copper Development Association Standing Seam Standing Seam Roof Roofing

Asbestos Application Methods Roofing Historic Preservation Historic Properties

How to nail down roll roofing step 1.
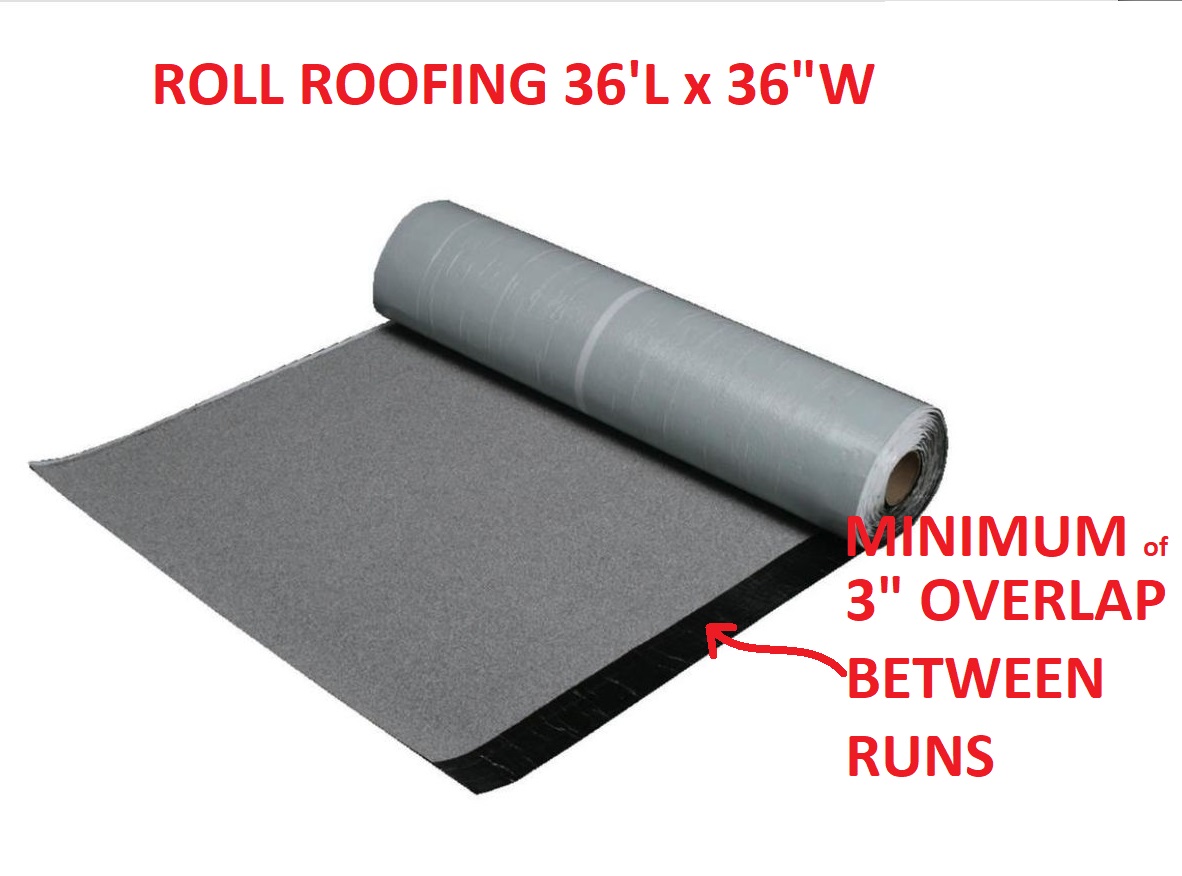
Rolled roofing nailing pattern. The installation of the shingles will go much smoother if the initial installation of the asphalt roll roofing is done properly. I m a true diyer when it comes to house projects and i ve learned a thing or two that could help with your diy project. Make sure there is a two inch space between the edge of the roll and the first nail. The nails should not go to the very outer edge of the roll.
Tack the upper edge of the second strip. Nail down the 18 inch roll roofing sheet that it is covering the valley. Using the exposed nail method snap a chalk line 35 inches above the eave. Apply about two inches worth of cement under either side to seal the roofing down and then nail it down making sure it still stays flat and even as you go.
Cover the valley of the roof. Tear out the sheathing that is emerging out of the valley. Use a trowel to spread roofing cement over half or more of the strips. In most cases 4 nails are adequate.
Align shingles properly to avoid nail exposure. There are two nail spacing considerations when it comes to installing asphalt rolls. Roll roofing is the perfect material choice for the diyer interested in tackling small roofing projects like a shed or porch roof that has a slight sloped roof or a flat roof. The nails should start.
Contact roofhelp 9 18 nailing pattern for roofing felt each row of nails that are 18 on center should be approximately 12 from the outside edge of the roll. Move over to the other spaces of the roof and start installing the roofing courses one by one in a definite pattern. Cover the preceding layer with 36 inch roll roofing. Hammer down the nails at the edges of the sheets covering the valley.
Once the first row is done add approximately two inches of cement to the top of the first row to secure the second row of roofing. Make sure that the roof is completely clean. Position the first sheet tack the top every 2 feet and nail the rake and. Here are my easy to follow step by step instructions for diy rolled roofing installation.
Install the rest of the. Roll out the first sheet and ensure that it lies flat and even. The valley of the roof is the point on the roof where the two sides meet. Position the nails appropriately according to the shingle installation instructions.

Pin On The Shopchimney Blog

How To Install Asphalt Shingles Nailing On Ridge Cap Building A Shed Shed Installing Roof Shingles

Check Out How To Fix Roll Roofing Problems In Easy Way Roofingproblem Fixingroofdamages Almeidaroofing Roof Problems Roll Roofing Roofing

Tile Roof Rooftopgarden Rooftop Garden Drawing Drawing Drawing 2020

V 11 Rain Diverter A Great Alternative To Gutters Gutters Rain Diverter Rain Gutters

Pin On Your Pinterest Likes
Asphalt Sbs Roll Roofing Installation Details How To Install Roll Roofing

How To Apply Roll Roofing Diy In A Hour

Gable Soffit And Fascia Vinyl Siding Installation Installing Siding Diy Roofing

Flat Roof Inspection With A Focus On Modified Bitumen The Ashi Reporter Inspection News Views From The American Soc In 2020 Flat Roof Roof Inspection Roof Detail

Pin On Roofing

Sheet Metal Roofing Contractors New York Zinc Roof Sheet Metal Roofing Metal Roofing Contractors

Gaf Timberline Hd Roofing Shingles Architectural Shingles Roof Architectural Shingles Roof Shingles

