Roof Boot Installation Instructions

Union Corrugating Provides How To Install Metal Roofing Videos For Masterrib Panels And Advantage Lok Ii Standing Seam Metal Metal Roof Fibreglass Roof Roofing

Pin On House Ideas

Pin On Putting Stuff On A Metal Roof

Plumbing Vent Boot On Roof Asphalt Roof Shingles Roof Shingles Roofing

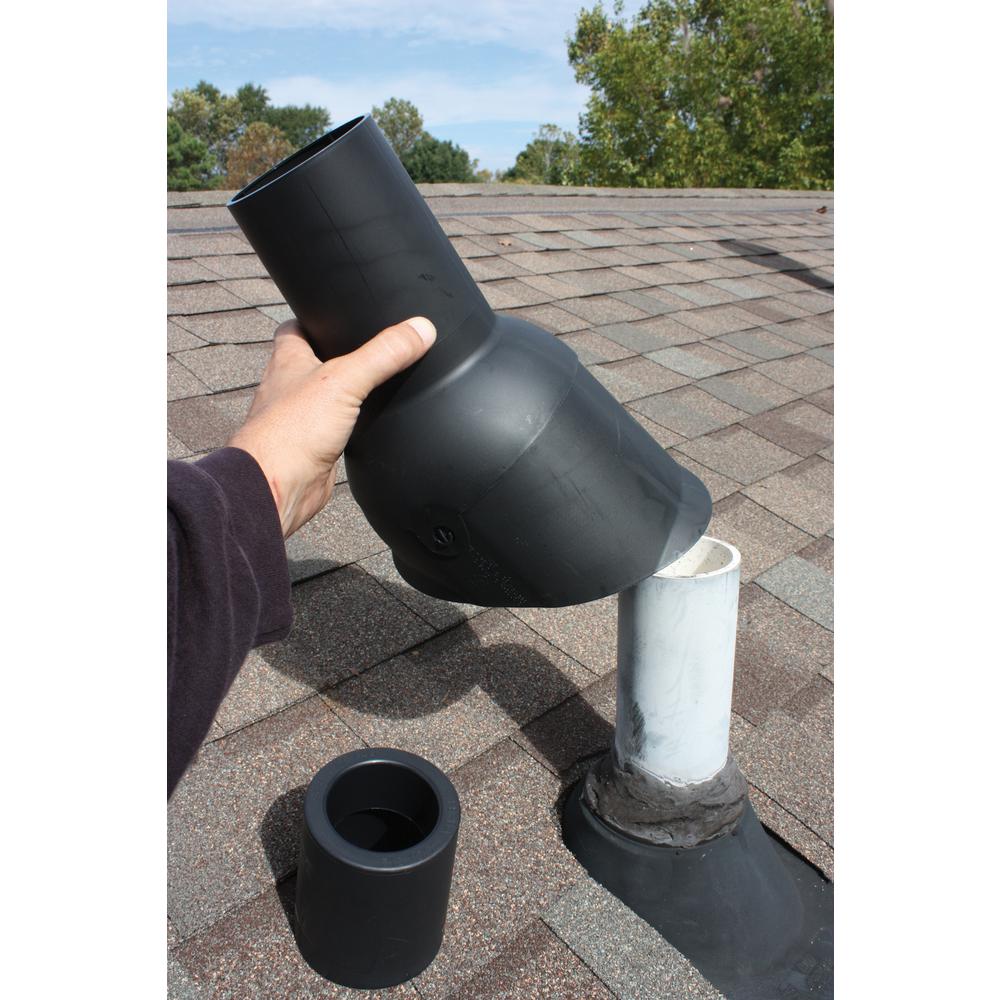
How To Install A Pipe Boot On Your Roof Youtube

Pin On Our Roofs

The roof boot is easily secured by lifting up a shingle and nailing the roof boot as instructed.
Roof boot installation instructions. Kozy kollar products are the only roof vent boot flashing or exhaust hood you install from inside a building and over shingles or similar roofing materials. While some skylight manufacturers include flashing in their products sometimes roofing professionals have to create it or purchase it separately. You will apply a 100 exterior or marine rated silicone caulk to the top of the existing rain collar attached to the roof flashing and also to the underside of the new rain collar. The edge of the roof has thin metal flashing that helps water drip off the roof without damaging the home or causing a leak.
Open valleys have metal flashing to protect this critical area of the roof. Be sure to like and subscribe in order to help me bring you more helpful videos filled with tips and tricks i ve learned over the years. It s critical to follow the manufacturer s instructions for the specific roof shingle because not all shingles have the same exposure the part of the shingle that s visible once installed offset the lateral distance between joints in successive courses sometimes called stagger or edge to edge spacing and or nail placement. Check out our images of the roof boot in action.
Also strong winds can blow rainwater under shingles. Roof boots are packaged and sold in pairs. Speed is king in residential roof installation but it can come at the expense of quality. Install the second course just like the first using the guidelines on the underlayment to get the correct overlap.
Install the roofing screws vertically along each rib in the panel. When an ice dam forms on a roof usually caused by poor attic insulation ventilation ice and water can work their way up under the shingles and leak back into the house. Patented and proven both systems form a weathertight seal for vent pipe penetrations and utilizes three independent gasket systems which are designed to work in conjunction with each other. After the correctly sized collar has been selected.
Plenty more videos t. Refer to the instructions tab for installation restrictions and recommendations. Slide the new rain collar down over the pipe to the top of the existing collar.

Pin On Ruf

Pin On At Home

Roof Boot Ladder Accessories Roofing Tools Roof Design

Pin On Front Porch

Pin On Home Diy And Maintenance

Article Image Plumbing Vent Plumbing Roofing Nails

Pin On Fireplace Chimney

Pin On Metal Roofing

Roof Pipe Flashing And Rubber Pipe Boot Installation Diy Instructions

How To Install A Metal Roof Metal Building Kits Metal Roof Installation Metal Roof

Pin On Tiny Houses

How To Install A Tin Roof Doityourself Com Tin Roof Roof Installation Metal Roof Leaks

How To Install Union S Masterrib Metal Roofing Panels Metal Roof Installation Roof Panels Corrugated Metal Roof